Monday, November 24, 2014

COVER UP THE UGLY WITH CRAFTINESS...


A few months ago (at least I think it was that long ago) I was in my favorite thrift store browsing.  I came across this adorable bright pink metal ice bucket with scoop attached!  I was in LOVE.  The pink would go perfectly with the color of the buttons in my expanded sewing room rug and I happen to have a bit of a "thing" for metal containers...so I was SOLD!  I have read over and over again on the web how crushed walnut shells are the best material for filling handmade pincushions.  I have hesitated to use them simply because of the "mess".  This bucket, however, would be a fun way to store the shells and keep them from migrating all over my room.  I handed over my money and almost skipped my way to the car (notice I said "almost"...you wouldn't want to see me try to skip, lol). 

Unfortunately, when I tried to remove the packing tape that the store had used to attach the lid and scoop (incredibly slowly and carefully), the paint came off.  To say I was upset is a gross understatement!  It wasn't the money, it was the destruction of my "perfect" little container that brought me near to tears.  The perfectionist in me considered tossing the bucket, but I couldn't part with  my new purchase!  I was, after all, in LOVE with its little pink cuteness. 

After calling the store to inform them how their "packaging" had ruined my purchase and suggesting they use painter's tape from now on, I perched my little bucket on the file cabinet while it waited to be filled. 


 Oh yes, it was still CUTE, but the missing paint glared at me every time I entered the room! 


The paint was missing most drastically from  the side where the scoop hung.  I had intended to turn the scoop toward the back anyway, but the tiny mark on the front still caught my eye.  After weeks of staring at the damage, an idea began to niggle at my brain.  A few years ago, while surfing the net, I discovered a very talented lady named Lucy and her wonderful blog, "Attic 24".  Lucy's love is crochet and her designs are always so bright and HAPPY!  My cheeks hurt from smiling every time I visit her blog!  Generously, Lucy shares numerous free tutorials.  One of her tutorials was for "Teeny Tiny Flowers".   She had combined these teeny, tiny crocheted flowers and buttons to make an adorable brooch to wear on her coat.

The wheels in my head began to turn.  Hmmmm...if I glued a magnet to the back of her "brooch" maybe I could use the little posy flowers to cover the damage on my bucket!


It took me multiple days to crochet the tiny flowers and leaves, but I am "thrilled" with how they add a pop of color and cuteness to my container...while covering the missing paint!


Even though the "back" of the bucket is facing my cubbies, I made a second brooch to cover the missing paint on the back.  Who knows?  Someday I may choose to showcase the tiny scoop as the front of my container!

Now, every time I walk into the room my eyes are drawn to the happy flowers!  Thankfully my "heart" kept me from throwing away a perfectly good container; and the craftiness of the lovely Lucy made it all seem brand new!  Now to buy the walnut shells...

Wednesday, November 19, 2014

KEEPING WARM...


It is freezing in my neck of the woods tonight!  I cannot believe we are at 30 degrees Fahrenheit   ALREADY and are expected to drop into the 20s as the night goes on.  It's too early in the season for this kind of cold!!!  I am just thankful that I do not live in the area of New York that is being hit so hard by the lake effect snow.  

Since it is just me home during the day, I am trying to keep myself reasonably warm, without owing the utility company my life savings!  I have the thermostat set to 68 degrees, run the gas fireplace on its own thermostat also set to 68, burn a candle for some additional ambiance to make me think I'm warm and keep the kettle filled for a constant flow of yummy piping hot tea.  

To offset the increasing bills, I am keeping all of the lights off, but one in the kitchen.  Fortunately the light carries into our family room and provides plenty of illumination to play on my IPAD.  I refuse to turn on the TV when I can be perfectly entertained by my battery powered tablet.  

Today I put on a long sleeved t-shirt, jeans, socks and shoes.  I thinks it is time to add a sweater to my daily ensemble...and maybe a pair of leg warmers if I can find a free crochet pattern on Ravelry.  

So, dear friends, what other tips can you give me for staying cozy and warm WITHOUT breaking the bank?  I can't wait to hear your ideas!

Toddles...


Thursday, November 13, 2014

THIRD GIFT FINISHED...

My Dear Hubby is patriotic to every bone in his body.  He has never served our country in the military, but I firmly believe if he could have...he would have.  Unfortunately his parents were both ill and there was a lot of responsibility in his life at a young age.  He picked a local college and lived at home while getting his degree...working full time to support himself and help his family the whole five years of his degree program.  But his love of country has never wavered. 

For Christmas he asked me to make him something "patriotic" to hang in his office at work.  Several years ago I had made a patriotic panel kit to hang in our finished basement.  With a lot of online searching, and even a cancelled order due to lack of stock, I finally found another panel.  It's not exactly the same, but similar enough that it will look good along side the other panel should he bring it home when he retires.  This wasn't a kit like the last wall hanging, but I knew I had plenty of batting and suitable (free) fabric for the backing and binding. 

I don't know about anyone else, but I find quilting panels of this type really difficult.  The coloration includes a lot of shading and detail that does NOT follow easy to quilt lines!  But, I did my best...cursed more than I would like to admit...and finished it up a few minutes ago.  I love it and am sure Dear Hubby will too.  Sorry the picture doesn't really show my quilting.  My camera is acting up and I'm having trouble getting a closer shot.  I KNOW it is something I have accidentally "set", but I'm too flustered to play with it right now!  I basically outline quilted everything with some detail quilting of the wings.  I didn't do any fancy FMQ because I know my husband would have said "flags don't have little swirls in them, etc."!  He just doesn't "get" quilting, LOL. 

Unfortunately, there is a bit of a wave along the edge of this panel, too.  Once again, I have not pressed it yet...but I have a feeling there is something "I" am doing to cause this.  So, my fellow quilters, can anyone tell me what I am doing wrong???

I am also considering adding a few star embelishments, but I am going to make my decision after I have had a chance to stare at it a while.  

Oh, I almost forgot the picture!  Tada....


Monday, November 10, 2014

SECOND CHRISTMAS GIFT DONE....


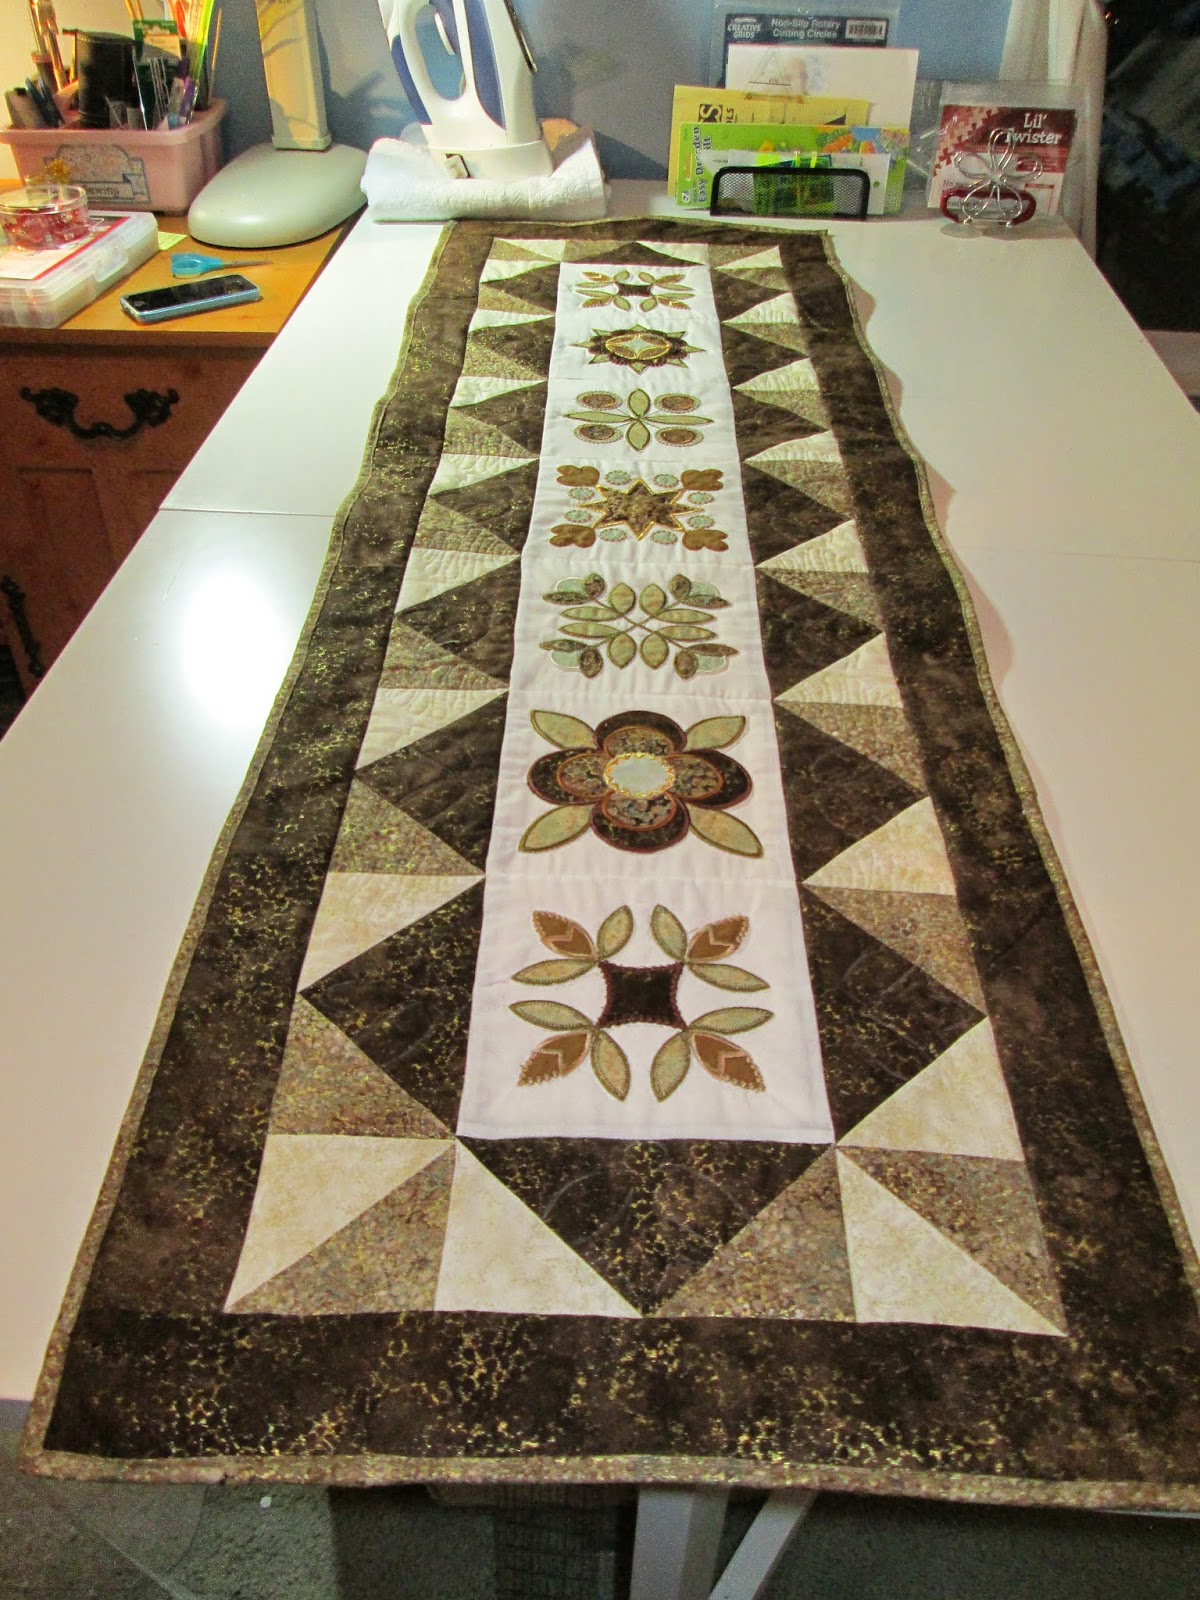
The island runner for my folks and aunt is done!  I'm loving it, but still a bit disappointed.  I have a very definite wave on the edge, toward the far end.  I have not pressed it yet, but I am sure the wave will not go away much.  Apparently my cutting was off.  I had some difficulty with the binding, I was WAY shorter than I expected it to be and had to piece it quite a bit to get it long enough.  I am wondering if that is part of the problem.  UPDATE:  I put some heavy books on the runner, figuring I would leave them there until I starch it and iron it another day.  The waves have disappeared!  Woohoo.  I will still press it nice before I wrap it.  Today I am too beat.  I pushed myself WAY too hard today and I feel horrible.  But that was the last of the "have to get done" for Christmas gifts.  I still want to work on J's quilt, but it is highly unlikely it will get done by the holiday.

Off to take a single Motrin and lie down. 

Thursday, November 6, 2014

FALL RUNNER UPDATE...


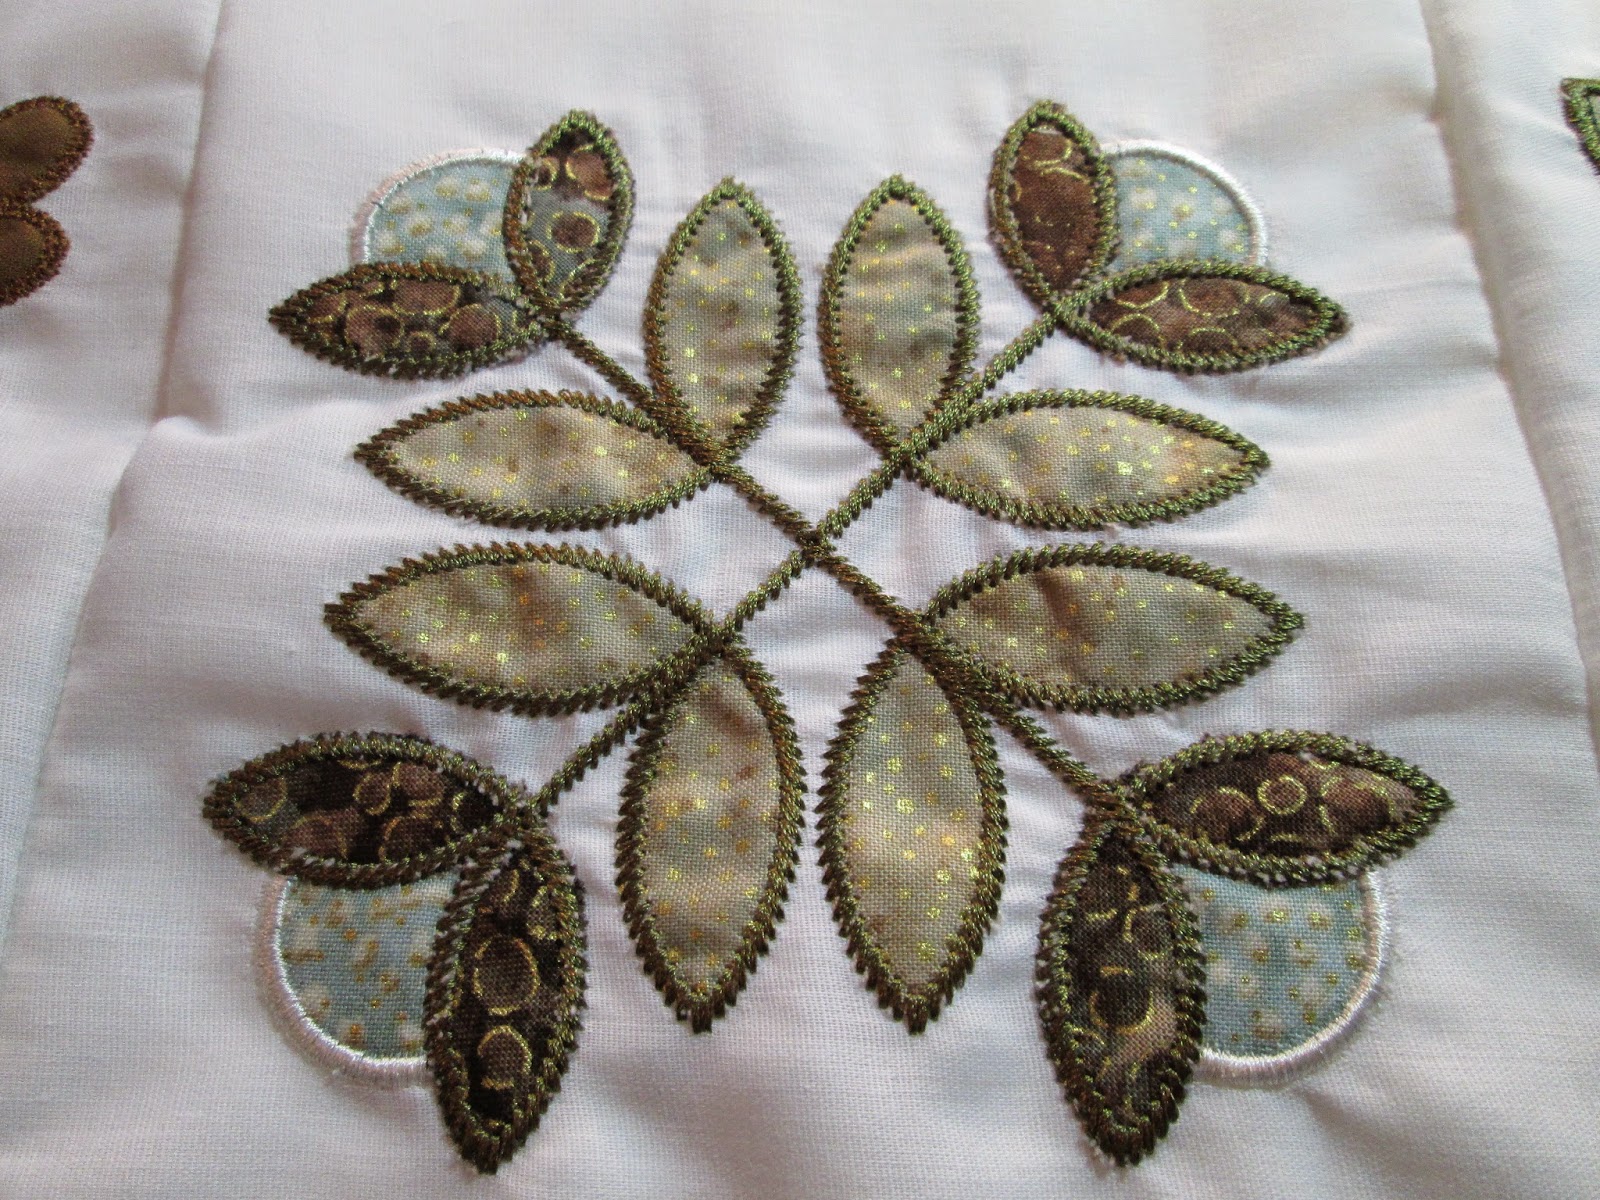
The applique blocks are finished and sewn together.  Hard to take a picture when the item is this long and I'm this short, lol.  So here is a "one by one" of each block...


This block is repeated as the first and last block.  For some reason my computer would not download the first block picture.  So just imagine this times two!


I don't know if you can tell, but the fabric I used was called Artisan Spirit Shimmer.  Each fabric has a bit of a gold shimmer in it.  I decided that I wanted a hint of metallic in three of the appliques.  Fortunately, since buying needles specifically for metallic thread (never knew there was such a thing) I had NO trouble at all with this applique!


This block was problematic!  It is simply a two color applique and the green and light aqua were SO DULL.  I considered making another block, but there is a "matching" of overall shapes on each side of the center block, and there was not another one I could use.  Sooooo....I looked online for a plain circle applique that I could buy.  None that I could find.  I DID find a machine embroidery pattern of different sizes of circles.  It was free, so I downloaded it right away.  I played around for a while with scraps of fabric and came up with something I thought would work. 

I reduced the size of the smallest circle so that it was sufficiently different in size than the existing circles and would allow some of the aqua to show through.  I then lined my needle up with the center of the aqua circle, and moved a few threads over toward the center of the block so there would be more aqua showing on the outer edges of the circles.  I then placed a piece of the brown fabric over the aqua and pressed start.  I kept my finger right over the button so I could quickly stop when needed.  After the machine had made a single stitch circle I hit stop.  I removed the hoop (leaving the fabric in place) and trimmed off the brown fabric around the stitched circle.  I put the hoop back in the machine, pressed start, and let the pattern stitch a beautiful satin stitch around the brown fabric.  I am LOVING the way it turned out.  Necessity IS the mother of invention. 


This is the center block and has the largest amount of metallic thread.


I have discovered my LEAST favorite part of machine embroidery...tearing off the stabilizer.  This block was particularly difficult.  I know I could use wash away stabilizer, but I really love the stiffness of the tear away during the embroidery process.


A little bit more metallic thread on this one...


This one again!

My next step will be cutting out the fabrics for the flying geese around the appliqued blocks.  I would love to do it today, but my body is not cooperating at all.  So...I will rest and hope tomorrow is a more productive day. 

Toodles...

Tuesday, November 4, 2014

A CHRISTMAS GIFT...


...for my Mom, Dad and Dear Aunt.  


These two are finished.  Five more to go.  I think I am REALLY going to like it in the earth-tone fabrics I picked to match their kitchen.  The only problem is, my Mom won't want to use it for fear of getting it dirty, lol.  But then again, maybe having this pretty runner on the island will keep the other stuff that tends to deposit there at bay!  Hmmmm....maybe I need a day-to-day runner for my island!

Toodles...