Monday, November 24, 2014

COVER UP THE UGLY WITH CRAFTINESS...


A few months ago (at least I think it was that long ago) I was in my favorite thrift store browsing.  I came across this adorable bright pink metal ice bucket with scoop attached!  I was in LOVE.  The pink would go perfectly with the color of the buttons in my expanded sewing room rug and I happen to have a bit of a "thing" for metal containers...so I was SOLD!  I have read over and over again on the web how crushed walnut shells are the best material for filling handmade pincushions.  I have hesitated to use them simply because of the "mess".  This bucket, however, would be a fun way to store the shells and keep them from migrating all over my room.  I handed over my money and almost skipped my way to the car (notice I said "almost"...you wouldn't want to see me try to skip, lol). 

Unfortunately, when I tried to remove the packing tape that the store had used to attach the lid and scoop (incredibly slowly and carefully), the paint came off.  To say I was upset is a gross understatement!  It wasn't the money, it was the destruction of my "perfect" little container that brought me near to tears.  The perfectionist in me considered tossing the bucket, but I couldn't part with  my new purchase!  I was, after all, in LOVE with its little pink cuteness. 

After calling the store to inform them how their "packaging" had ruined my purchase and suggesting they use painter's tape from now on, I perched my little bucket on the file cabinet while it waited to be filled. 


 Oh yes, it was still CUTE, but the missing paint glared at me every time I entered the room! 


The paint was missing most drastically from  the side where the scoop hung.  I had intended to turn the scoop toward the back anyway, but the tiny mark on the front still caught my eye.  After weeks of staring at the damage, an idea began to niggle at my brain.  A few years ago, while surfing the net, I discovered a very talented lady named Lucy and her wonderful blog, "Attic 24".  Lucy's love is crochet and her designs are always so bright and HAPPY!  My cheeks hurt from smiling every time I visit her blog!  Generously, Lucy shares numerous free tutorials.  One of her tutorials was for "Teeny Tiny Flowers".   She had combined these teeny, tiny crocheted flowers and buttons to make an adorable brooch to wear on her coat.

The wheels in my head began to turn.  Hmmmm...if I glued a magnet to the back of her "brooch" maybe I could use the little posy flowers to cover the damage on my bucket!


It took me multiple days to crochet the tiny flowers and leaves, but I am "thrilled" with how they add a pop of color and cuteness to my container...while covering the missing paint!


Even though the "back" of the bucket is facing my cubbies, I made a second brooch to cover the missing paint on the back.  Who knows?  Someday I may choose to showcase the tiny scoop as the front of my container!

Now, every time I walk into the room my eyes are drawn to the happy flowers!  Thankfully my "heart" kept me from throwing away a perfectly good container; and the craftiness of the lovely Lucy made it all seem brand new!  Now to buy the walnut shells...

Wednesday, November 19, 2014

KEEPING WARM...


It is freezing in my neck of the woods tonight!  I cannot believe we are at 30 degrees Fahrenheit   ALREADY and are expected to drop into the 20s as the night goes on.  It's too early in the season for this kind of cold!!!  I am just thankful that I do not live in the area of New York that is being hit so hard by the lake effect snow.  

Since it is just me home during the day, I am trying to keep myself reasonably warm, without owing the utility company my life savings!  I have the thermostat set to 68 degrees, run the gas fireplace on its own thermostat also set to 68, burn a candle for some additional ambiance to make me think I'm warm and keep the kettle filled for a constant flow of yummy piping hot tea.  

To offset the increasing bills, I am keeping all of the lights off, but one in the kitchen.  Fortunately the light carries into our family room and provides plenty of illumination to play on my IPAD.  I refuse to turn on the TV when I can be perfectly entertained by my battery powered tablet.  

Today I put on a long sleeved t-shirt, jeans, socks and shoes.  I thinks it is time to add a sweater to my daily ensemble...and maybe a pair of leg warmers if I can find a free crochet pattern on Ravelry.  

So, dear friends, what other tips can you give me for staying cozy and warm WITHOUT breaking the bank?  I can't wait to hear your ideas!

Toddles...


Thursday, November 13, 2014

THIRD GIFT FINISHED...

My Dear Hubby is patriotic to every bone in his body.  He has never served our country in the military, but I firmly believe if he could have...he would have.  Unfortunately his parents were both ill and there was a lot of responsibility in his life at a young age.  He picked a local college and lived at home while getting his degree...working full time to support himself and help his family the whole five years of his degree program.  But his love of country has never wavered. 

For Christmas he asked me to make him something "patriotic" to hang in his office at work.  Several years ago I had made a patriotic panel kit to hang in our finished basement.  With a lot of online searching, and even a cancelled order due to lack of stock, I finally found another panel.  It's not exactly the same, but similar enough that it will look good along side the other panel should he bring it home when he retires.  This wasn't a kit like the last wall hanging, but I knew I had plenty of batting and suitable (free) fabric for the backing and binding. 

I don't know about anyone else, but I find quilting panels of this type really difficult.  The coloration includes a lot of shading and detail that does NOT follow easy to quilt lines!  But, I did my best...cursed more than I would like to admit...and finished it up a few minutes ago.  I love it and am sure Dear Hubby will too.  Sorry the picture doesn't really show my quilting.  My camera is acting up and I'm having trouble getting a closer shot.  I KNOW it is something I have accidentally "set", but I'm too flustered to play with it right now!  I basically outline quilted everything with some detail quilting of the wings.  I didn't do any fancy FMQ because I know my husband would have said "flags don't have little swirls in them, etc."!  He just doesn't "get" quilting, LOL. 

Unfortunately, there is a bit of a wave along the edge of this panel, too.  Once again, I have not pressed it yet...but I have a feeling there is something "I" am doing to cause this.  So, my fellow quilters, can anyone tell me what I am doing wrong???

I am also considering adding a few star embelishments, but I am going to make my decision after I have had a chance to stare at it a while.  

Oh, I almost forgot the picture!  Tada....


Monday, November 10, 2014

SECOND CHRISTMAS GIFT DONE....


The island runner for my folks and aunt is done!  I'm loving it, but still a bit disappointed.  I have a very definite wave on the edge, toward the far end.  I have not pressed it yet, but I am sure the wave will not go away much.  Apparently my cutting was off.  I had some difficulty with the binding, I was WAY shorter than I expected it to be and had to piece it quite a bit to get it long enough.  I am wondering if that is part of the problem.  UPDATE:  I put some heavy books on the runner, figuring I would leave them there until I starch it and iron it another day.  The waves have disappeared!  Woohoo.  I will still press it nice before I wrap it.  Today I am too beat.  I pushed myself WAY too hard today and I feel horrible.  But that was the last of the "have to get done" for Christmas gifts.  I still want to work on J's quilt, but it is highly unlikely it will get done by the holiday.

Off to take a single Motrin and lie down. 

Thursday, November 6, 2014

FALL RUNNER UPDATE...


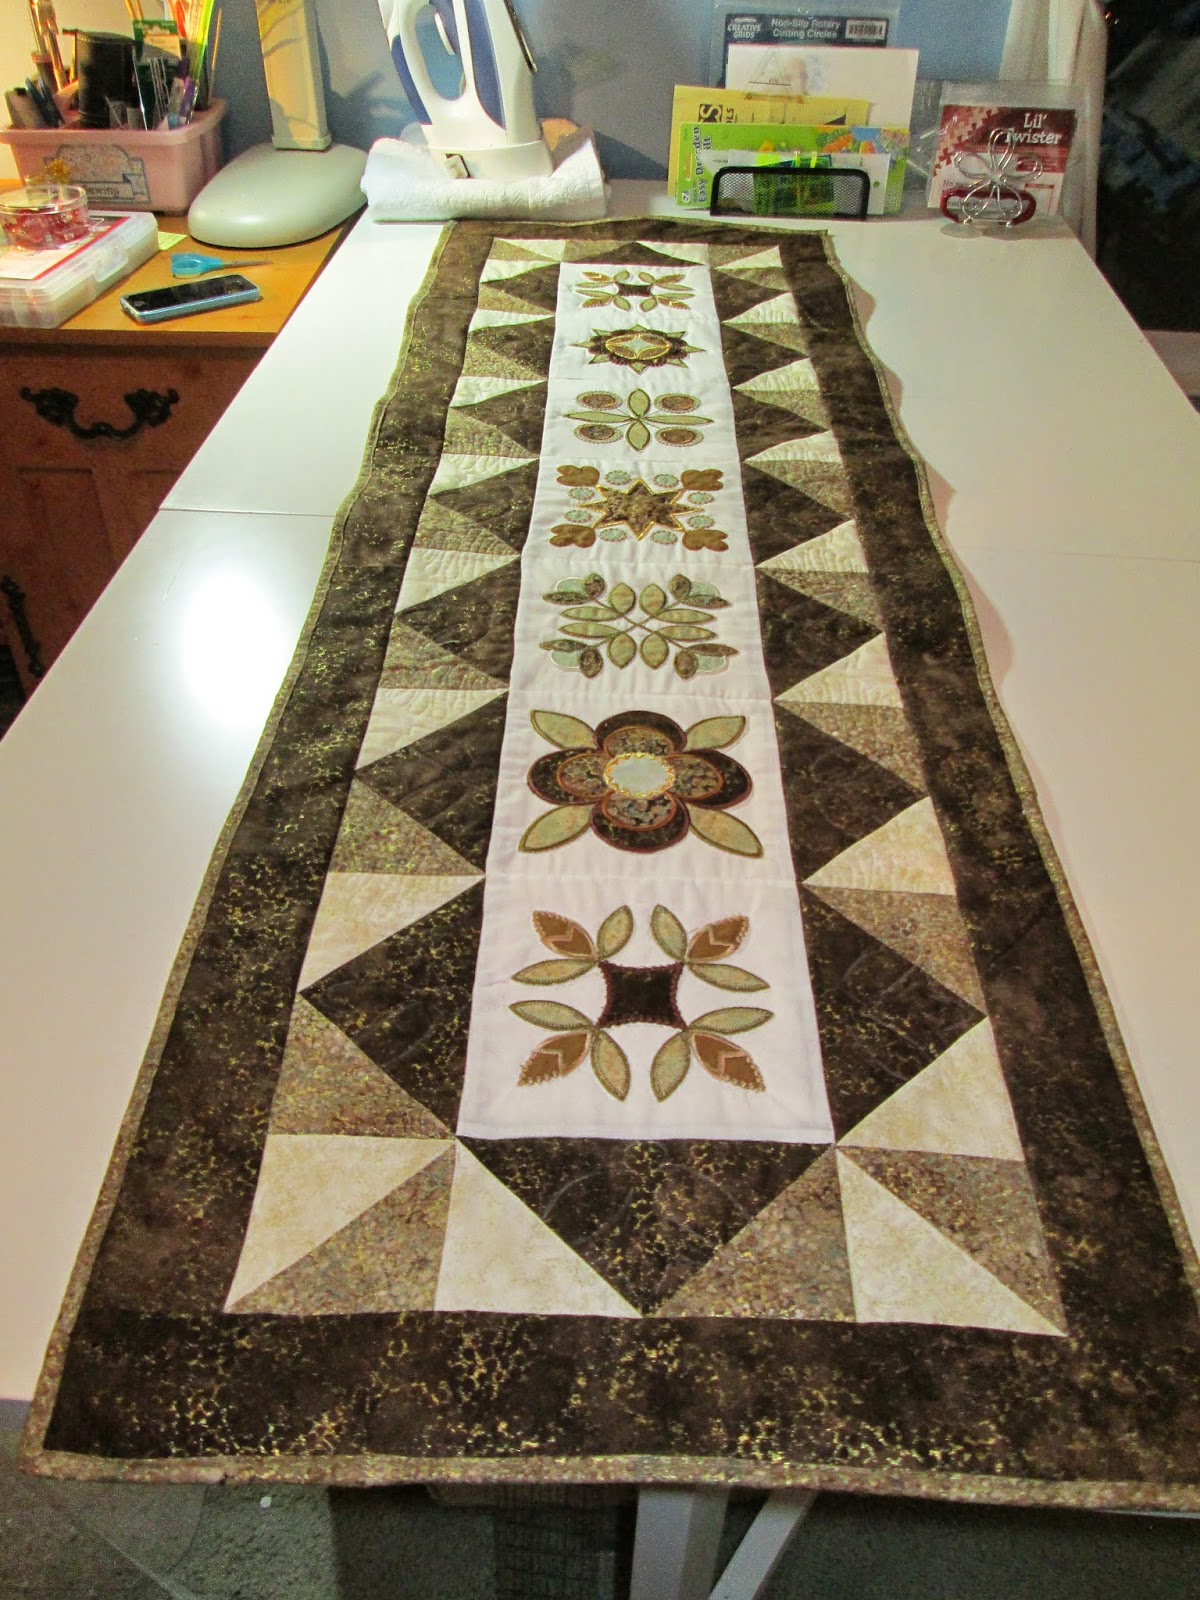
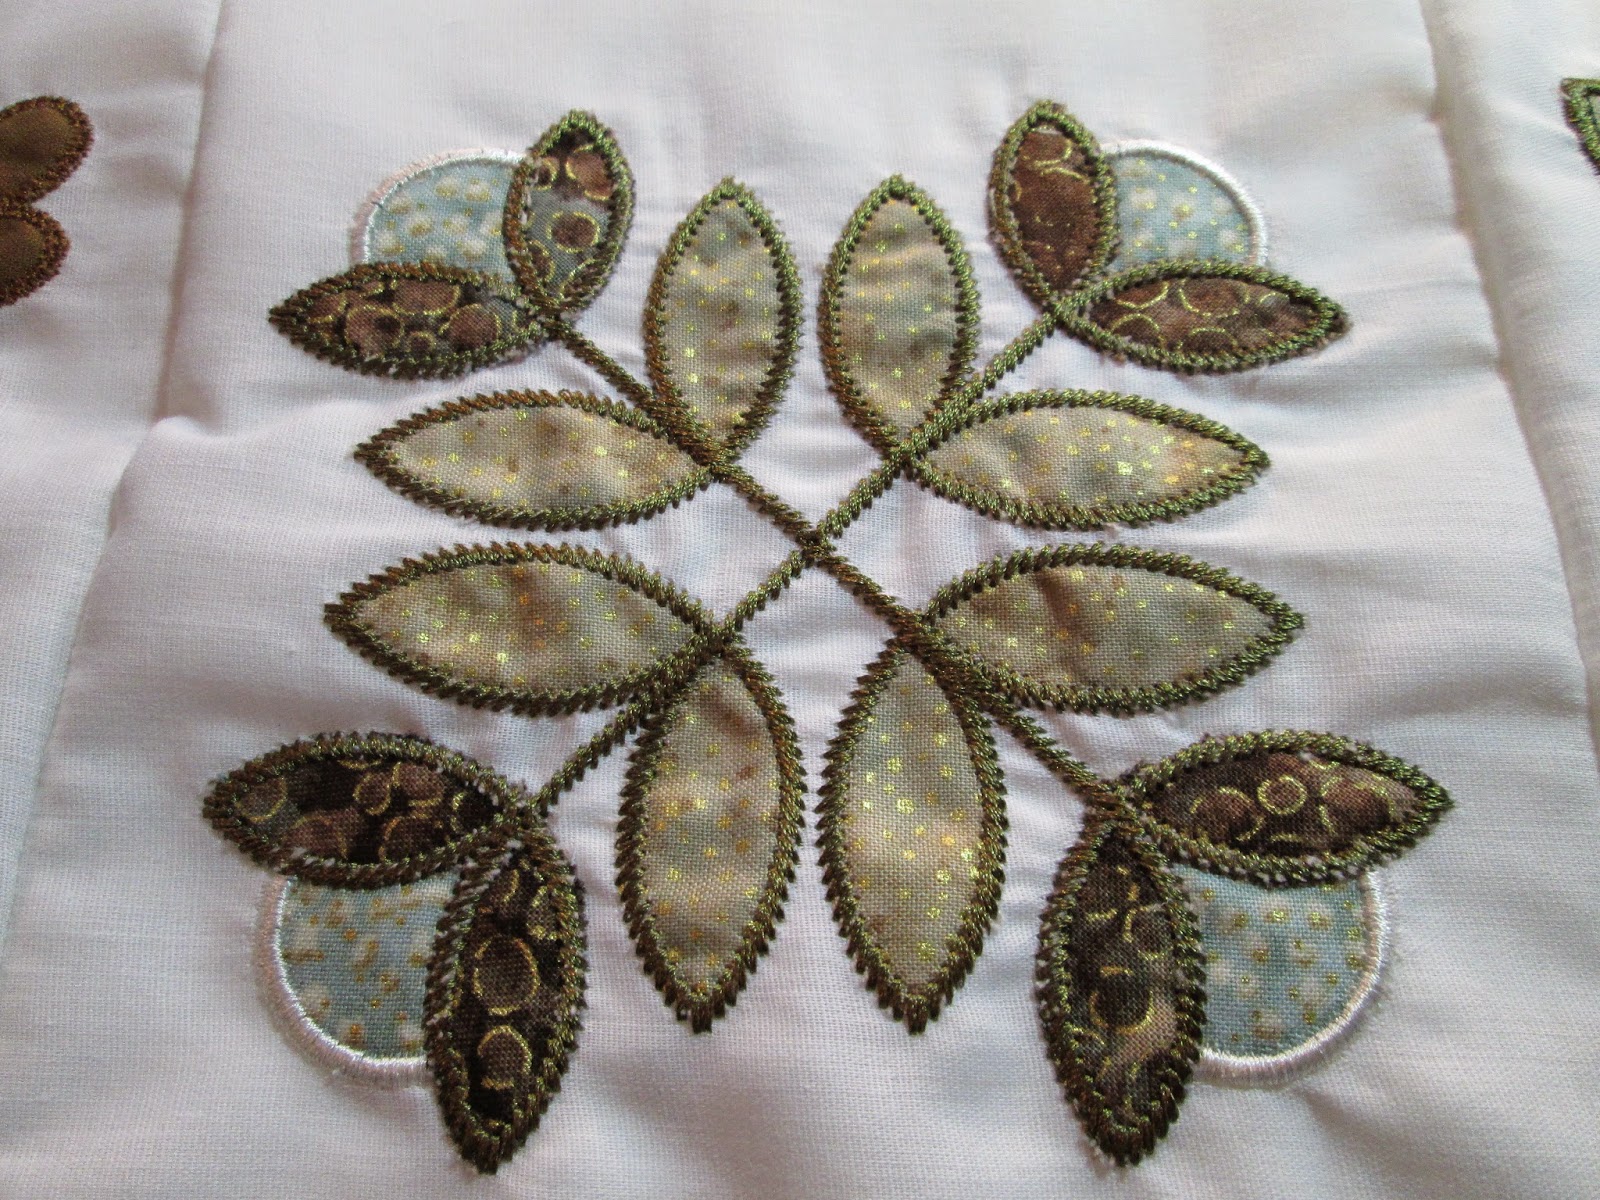
The applique blocks are finished and sewn together.  Hard to take a picture when the item is this long and I'm this short, lol.  So here is a "one by one" of each block...


This block is repeated as the first and last block.  For some reason my computer would not download the first block picture.  So just imagine this times two!


I don't know if you can tell, but the fabric I used was called Artisan Spirit Shimmer.  Each fabric has a bit of a gold shimmer in it.  I decided that I wanted a hint of metallic in three of the appliques.  Fortunately, since buying needles specifically for metallic thread (never knew there was such a thing) I had NO trouble at all with this applique!


This block was problematic!  It is simply a two color applique and the green and light aqua were SO DULL.  I considered making another block, but there is a "matching" of overall shapes on each side of the center block, and there was not another one I could use.  Sooooo....I looked online for a plain circle applique that I could buy.  None that I could find.  I DID find a machine embroidery pattern of different sizes of circles.  It was free, so I downloaded it right away.  I played around for a while with scraps of fabric and came up with something I thought would work. 

I reduced the size of the smallest circle so that it was sufficiently different in size than the existing circles and would allow some of the aqua to show through.  I then lined my needle up with the center of the aqua circle, and moved a few threads over toward the center of the block so there would be more aqua showing on the outer edges of the circles.  I then placed a piece of the brown fabric over the aqua and pressed start.  I kept my finger right over the button so I could quickly stop when needed.  After the machine had made a single stitch circle I hit stop.  I removed the hoop (leaving the fabric in place) and trimmed off the brown fabric around the stitched circle.  I put the hoop back in the machine, pressed start, and let the pattern stitch a beautiful satin stitch around the brown fabric.  I am LOVING the way it turned out.  Necessity IS the mother of invention. 


This is the center block and has the largest amount of metallic thread.


I have discovered my LEAST favorite part of machine embroidery...tearing off the stabilizer.  This block was particularly difficult.  I know I could use wash away stabilizer, but I really love the stiffness of the tear away during the embroidery process.


A little bit more metallic thread on this one...


This one again!

My next step will be cutting out the fabrics for the flying geese around the appliqued blocks.  I would love to do it today, but my body is not cooperating at all.  So...I will rest and hope tomorrow is a more productive day. 

Toodles...

Tuesday, November 4, 2014

A CHRISTMAS GIFT...


...for my Mom, Dad and Dear Aunt.  


These two are finished.  Five more to go.  I think I am REALLY going to like it in the earth-tone fabrics I picked to match their kitchen.  The only problem is, my Mom won't want to use it for fear of getting it dirty, lol.  But then again, maybe having this pretty runner on the island will keep the other stuff that tends to deposit there at bay!  Hmmmm....maybe I need a day-to-day runner for my island!

Toodles...

Tuesday, October 28, 2014

CHRISTMAS IS CLOSER THAN YOU THINK...


...but my kitchen island will be decked out in style!  Considering all that has been going on around here with my Mom in the hospital last week, and my usual body response to any type of activity or stress, I'm amazed that I pulled it off.  I would love to make a matching table topper, but there is quite a bit of difference between reality and fantasy, lol.  In my dreams, I guess.  Maybe next year...

I do have a few more projects that I would LIKE to get done prior to Christmas, but I think family members will be getting a couple of IOUs this year.  Without a little elven help I don't see it happening before the 25th.  Oh well, it will still be Christmas and with a little ingenuity I am sure I can make opening IOUs something fun for the recipient.  And, as much as I love giving (really MUCH more than receiving), presents aren't the real "reason for the season", now are they?

So, I will be thankful for the most important gifts I've ever received, our Lord as my Savior...and an incredibly loving family who are still together to celebrate the holiday.  Yup, I've got a LOT to be thankful for this year!

Wednesday, October 22, 2014

ALMOST A RUNNER...


...for my kitchen island this Christmas!  Yesterday was the last class.  I had a GREAT time!


The pattern actually calls for a 4" border all the way around and then the binding.  However, when I took the runner down to my island, I discovered that if I did add the 4" border it would be longer than my island and proportionately too wide. 

So I am calling it "completely pieced" at this point and will begin the "stitch in the ditch" quilting tomorrow.  Hopefully by the weekend this will be done.  Then I will consider making a "non-Christmas" one for my folks/aunt for a Christmas gift.  They have a huge island and mom mentioned they would like to find an "everyday" runner for on top of the granite.  I think I may have some batiks in their colors.  Their island is much larger than mine, so the full size runner would be perfect. 

Toodles...

Sunday, October 19, 2014

SECOND VERSE, SAME AS THE FIRST....and so on, and so on...


Over this weekend I finished the last two rows of the first block and an entire second block!  I am beat!  I am going to clean up my room a bit so it is good to go first thing tomorrow and then I am going to go relax with Dear Hubby.  I have either 10 more or 18 more to go.  At least my points are matching a bit better on the second block...so I'm learning, lol. 

Toodles...

Thursday, October 16, 2014

MY COLLAPSIBLE CRAFT CONTAINER...


After existing for the last 14 months as a free tutorial on my blog, the instructions for this versatile collapsible container have been removed from my blog and listed for sale in my Craftsy shop.  Just go to www.craftsy.com and search for Uggabear to find the pattern!

Wednesday, October 15, 2014

THE FIRST BLOCK...


I'm two-thirds done the first block for J's quilt.  This is my first attempt at half square triangles, and as you can see my center points are not perfect.  But, I have a minimum of 11 more blocks to practice on and once I add quilting, etc. the slight jog on this block won't be noticeable (I hope, lol).  I was really hoping to get one full block today but I'm too tired. 

More to come!

Toodles...

Monday, October 13, 2014

MORE PROGRESS ON MY TABLE RUNNER...


I finished the 7 blocks I needed for my table runner on Sunday.  After I had taken this picture I removed the stabilizer and cut them all down to size.  At my next class we will begin assembly.  I can't WAIT! 

More to come...

Wednesday, October 8, 2014

LEARNING SOMETHING NEW...

Tuesday I attended a class at the wonderful shop where I purchased Ellie (my sewing machine).  I have always wanted to learn how to do applique with my embroidery module, and Hayes Sewing Machines in Wilmington, DE is the perfect learning environment.  The whole Hayes family is incredibly knowledgeable, talented, patient and SUPER friendly!  They make everyone feel right at home...which is why I travel 50 miles each way to take their classes!

Want a peak at my first two blocks?


I am making a Christmas Table Runner for my kitchen island. 

I still have 5 more blocks to applique and then I have to trim all 7 blocks before our next class.

FUN homework!

Wednesday, October 1, 2014

A NEW QUILT...my least favorite part...


A few months ago I began designing a quilt for J & K for Christmas.  The quilt was to be modern (to suit both of them) with Celtic touches to highlight her heritage.  I was still up in the air as to whether each block would be separated by a sashing that was quilted heavily in a Celtic theme. 

Unfortunately, since that time, their 4 year relationship/engagement has ended.  It has been a rough time for all of us, especially my dear, sweet J who firmly believed he had found his soul-mate in K.  But life goes on...

Now that I have finished the placemat gift for our friend, it is time to begin work on a quilt that is J's alone.  His quilt is going to be made exclusively of HST's (half square triangles), without sashing between each block.  I feel this will make his quilt more masculine and modern.  His quilting will be "loosely" themed around his love of computers.  He has been a "computer geek" for the past 16 years and currently works at a computer service company.  Technology is truly "him". 


I designed his quilt to be either 3 or 4 (pictured above) blocks wide and 4 or 5 blocks long. 


His blocks will be made primarily of the light gray, medium blue and dark blue, his favorite colors.  The beautiful batik fabric will be used for the binding.  While sized to fit his queen bed, this quilt will also be perfect draped across the gray sofa we purchased for his apartment last Christmas. 


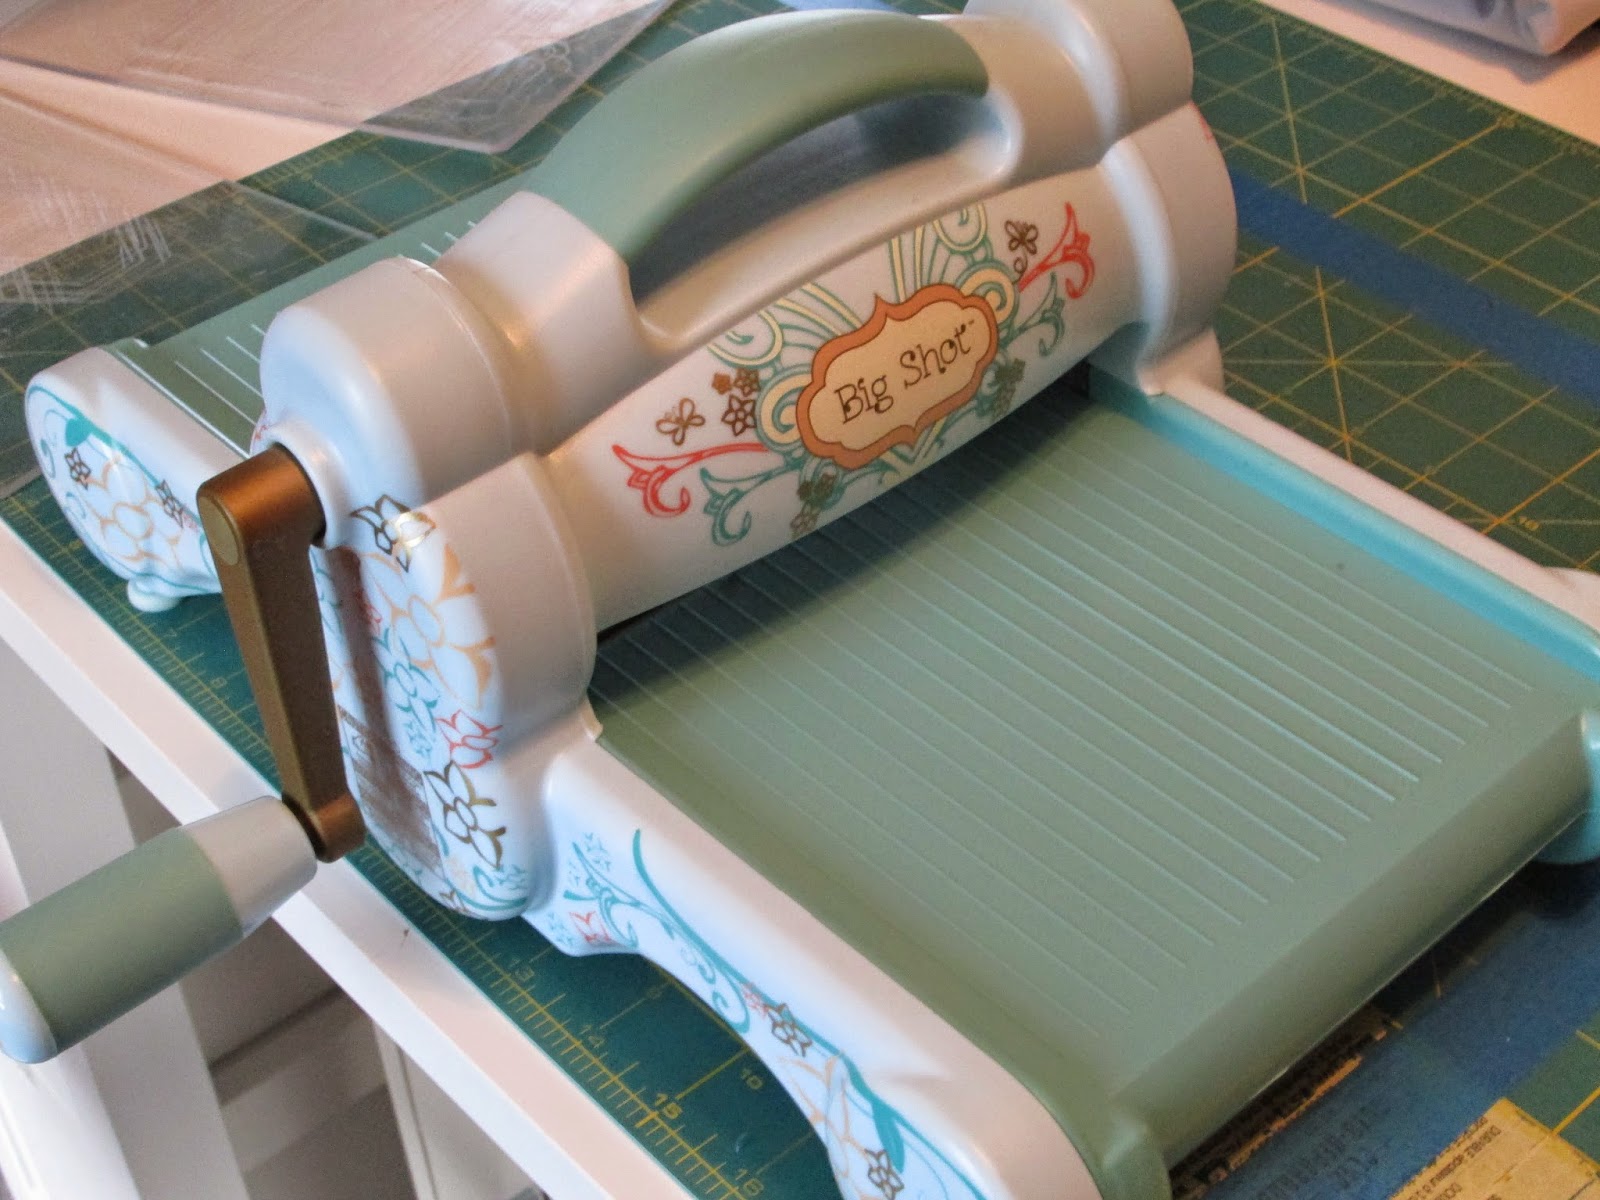
I have never before made a quilt that consisted of so many small pieces and decided maybe it was time to give my Sizzix Big Shot its first real workout.


I waited for a sale at the Sizzix website and purchased a HST cutting die. 


The die cuts two half square triangles at a time and can be stacked with 8 pieces of fabric per pass through the machine.  Given that the "squares" formed by sewing together the two HST's will "finish" at 4", it is going to take A LOT of HST's to finish his quilt! 

I began by cutting 5.5" wide strips of fabric...


...cutting 5.5" squares to place into the Big Shot...


...stacking 8 squares at a time...


...and running them through the machine.  I realize that I could have "accordion folded" the fabric instead of cutting individual 5.5" squares...but I HATE having to remember which is the front and back of the fabric!  By stacking, I know the front of the fabric is facing up in the machine...and I feel I am less likely to have a triangle miscut. 


Unfortunately, the cuts are not always complete and I sometimes need to snip one or two tiny threads in order to separate the HST's. 

While using my Big Shot is definitely easier and more precise than rotary cutting, I have discovered something about this part of the process that had never quite dawned on me before.  I HATE the fabric cutting stage of making a quilt!  It seems like I am making absolutely NO progress on the finished project...which is frustrating me to no end! 

So, I have decided to move on to cutting some HST's from the other two fabrics and begin piecing the individual blocks, each consisting of a whopping 32 gray HST's, 20 light blue HST's and 20 dark blue HST's.  Maybe then my creative self will feel fully engaged in the process. 

While I had never REALLY believed I could finish J's quilt in time for Christmas, this long "cutting" process is pushing it back as far as his birthday or maybe even NEXT Christmas!  And to think...I hoped to complete a postage stamp quilt some day!  Maybe not...


Tuesday, September 23, 2014

SHARON....I never got your email...

Sharon,

It appears you are a no-reply blogger and I can't respond to your emails.  I have never received your address.  Please send it to:

jusmom88blog@gmail.com

Please reply to this post and let me know when you have sent it.

Thanks,
Lin

Sunday, September 21, 2014

AND THE WINNER IS....


I know.  I am not very computer literate, lol.  For some reason I could NOT get this copied onto my computer, so you have to settle for a photo of the results. 

Number six...Sharon J. Hughson you are the winner! Please send me your address and I will get the green one out to you right away! 

Thanks everyone for helping me to celebrate my 2 year blogiversary.  It sorta got buried with all of the other goings on in our home (dad is doing GREAT) but this little contest kept it near the top of my mind as I counted down to today.

Toodles!

Sunday, September 7, 2014

GIFT PLACEMATS ARE FINISHED...


Today I finally finished the six placemats that will be a gift for a friend.  We will deliver them next weekend and I can't wait to see her reaction!

Here is the front:


And the back:


These placemats have taken FOREVER and involved a whole lot of ripping!  BUT, I have gotten a LOT better at binding by the time I had binded, and then rebinded, them LOL.   Dear Hubby questioned why the cans weren't centered on the back, and why each back is just slightly different.  This fabric was from Spoonflower and, given the cost of their fabric, it would have taken a whole lot more material and money to be able to make the back as pretty as the front, lol.  I guess she COULD use them as reversible, though they weren't meant to be that way. 

Whew, I need a rest!  Maybe tomorrow I will start on a few other Christmas gifts!

Toodles...

Thursday, September 4, 2014

TWO YEARS....

Can it really be that my little blog will be two years old on September 7th?  As I said to an old friend the other day, "We must REALLY be having fun because time sure is flying!"

I know things are going to get even crazier in my life with my Dear Dad's surgery next week, so I am going to celebrate my Blogiversary with a little less fanfare than normal.  I don't have time to go out and shop for a ton of goodies to giveaway in celebration, so I am going to give away something handmade by me! 

Starting today, followers to my blog will be able to win one of two drawstring sewing pouches...complete with a matching needle case and pincushion inside. 


Simply follow my blog and leave me one comment telling me:  a) How you follow and b) Which color you prefer...brown or green.   That's it! Easy, peasy!  Winner will be picked on 9/21/14.  This giveaway is open to all readers.


Wednesday, August 27, 2014

HANDLING STRESS....

Life here in the cottage is NUTS!  No two ways about it, life is crazy and there is absolutely nothing I can do about it!

We got back Dad's test results and there is another new cancer in his lung.  We will be going back down to the city at the beginning of September to discuss the particulars with the doctor and then he will be operated on come September 11th.  He has decided this is the LAST time he is going through surgery.  At almost 82 years old he figures he isn't going to live a whole lot longer and something else will probably take him before the slow growing cancer has a chance to take him.  So after this surgery he is going to "wait and see" and possibly consider something like radiation therapy in the future.  My Dad is handling this all well, but my Mom is beside herself.  Unfortunately, telling her to calm down doesn't really do anything.  Calming needs to come from within.  I am trying to remind myself of that!

Due to the stress, my health issues have flared much worse.  My pain has been more intense, my tremor is more pronounced and frequent and I have started having "twitches" or "tics" when I lie in bed at night trying to go to sleep.  I'm keeping myself and Dear Hubby awake!  My doctor has been discussing relaxation and stress relief with me.  I am supposed to remember to "breathe".  I find myself either hyperventilating or holding my breath numerous times throughout the day.  My muscles are tense, which makes everything worse.  I can't take any type of anti-inflammatory for the pain because once again I am bleeding internally and am becoming anemic.  I did NOT need this right now, lol. At last consultation with my gastroenterologist, the only cure for me is surgery.  Nope, not ready to handle that right now!  So please, hook up the IV iron and pump me full.  I've got too much on my plate right now to even think about surgery for me!

After I finished my Aunt's quilt I began work on a set of place mats for a friend.  Her kitchen is decorated in Campbell's Soup decor.  I don't know if it is the colors, my eyes, or the time of year/sunshine but I just can't seem to get enough light to work past noon! 


So, this past Friday Dear Hubby took me to Ikea to get a new floor lamp.  It is a Kvart.  I absolutely LOVE the amount of light it provides.  It was a breeze to put together until I reached the screws.  


Oh. My. Goodness.  Those screws were TINY!  Look at the size compared to the head of a pin!  I was trying to put them into the lamp alone.  Not a good idea.  I was shaking, tremoring, screaming and using more four letter words than the situation probably called for.  But, my stress level is Through. The. Roof!  Dear Hubby pulled himself up the stairs (despite his horrendous pain) and took over building the lamp for me.  God, I don't know what I would do without him.  I am truly blessed. 

Back to the placemats...


This is how my work space looks right now.  I have tried to hoop that placemat numerous times and it is always crooked.  Time to stop!  My work table is a MESS, and I find it really difficult to work in messiness!  However, I need all of those supplies to construct the placemats and I don't want to have to keep pulling them out of storage at every step, lol. 

I ordered the Campbell's Soup fabric on Spoonflower.  Then I searched the internet to find a "soup themed" embroidery.  There wasn't much to pick from, but I did find one I really liked.


This is the machine embroidery I just finished a few moments ago.  It is the fourth one I have done.  I had hoped to finish the last three today (I'm giving her 6) so I could assemble them for delivery this weekend.  BUT, even dear Ellie (my sewing machine) is having a bad day!  This ONE embroidery resulted in a broken needle and broken thread - twice!  What the heck?  Machine embroidery, especially all one color, should be easy!  Just hoop the fabric, thread the needle and push start! 

I"m taking the hint and stopping EVERYTHING today!  I am going to head downstairs, pour a glass of wine and plop myself down in front of the TV praying for something mindless to watch.  Maybe I will see if I remember any Lamaze from 26+ years ago.  Lamaze is nothing but relaxation and focus and I could sure use a strong dose of both right now!

So, if I am not around for a while...don't panic.  I will return once I am calmer.  That could be in the next few hours, days or weeks after Dad's surgery is over.  As usual, we would all sincerely appreciate any prayers, thoughts or virtual hugs you could send his way.

Toodles...