
Back in 2010 I shut down my business. For 12+ years I had spent almost every waking moment in this room, running a business that I loved. But things change and life goes on.
For Christmas that year my Dear Hubby and J emptied out my old office furniture to turn my "beloved office" into my "beloved sewing room". My first purchase for the sewing room was this wonderful table. I found it on Craigslist... for a mere $60! I was thrilled. On the prescribed evening J and I drove to the owner's home to pick up my purchase. Oh My Goodness, what an ordeal!!! The owner lived on an OLD, tiny, one-way street with virtually NO parking. When I DID find a parking space, I had to parallel park...something I haven't done since 1979 when I moved out of the city! The entrance to her home was up a set of four really STEEP steps leading through a teeny, tiny front door! AND...it was POURING!!! Not a fast drizzle, but a downpour that turned the gutter into a raging torrent of water. After a good amount of slipping, sliding, splashing and cursing (from me when I dropped my end and dented the perfect piece I had just purchased...okay I think I have a "thing" for alliteration, LOL) we managed to heft this rather bulky piece of furniture into my Highlander. I was THRILLED! I couldn't WAIT for Dear Hubby and J to carry it up to my sewing room. However, my room still needed some sort of "desk". I needed a place where I could peruse the internet, handle the household phone calls/paperwork and while away the day if I wasn't sewing.

Dear Hubby found a PERFECT desk unit for me, with a matching lateral file and 4 section cubby! The furniture was a darn close match to my sewing table, felt very sturdily built, provided just the right amount of storage for my "home" office and was on sale!!! Combined with coupons and rewards cash it was a deal too good to be true! I came home one afternoon from a full morning of medical testing to find that J had spent HOURS assembling my furniture. This mama's heart melted...
While the furniture is VERY sturdily built and has held up WONDERFULLY to daily use over the past five years...the FINISH is absolute JUNK! Apparently, the wood grain is simply a photo glued in place. Now don't get me wrong...I knew this wasn't wood from day one and knew all about this type of finish! My old office furniture was the original "flat pack" furniture brought out in the 1980's. It had survived daily use from 1988 to 2010 and the finish was still in perfect condition when Dear Hubby and J carried it out of my room. I was even able to sell all five bookcases on Craigslist because they were in such wonderful shape!

But this finish is coming off if I accidentally allow tape or Post-It's to touch the desk!
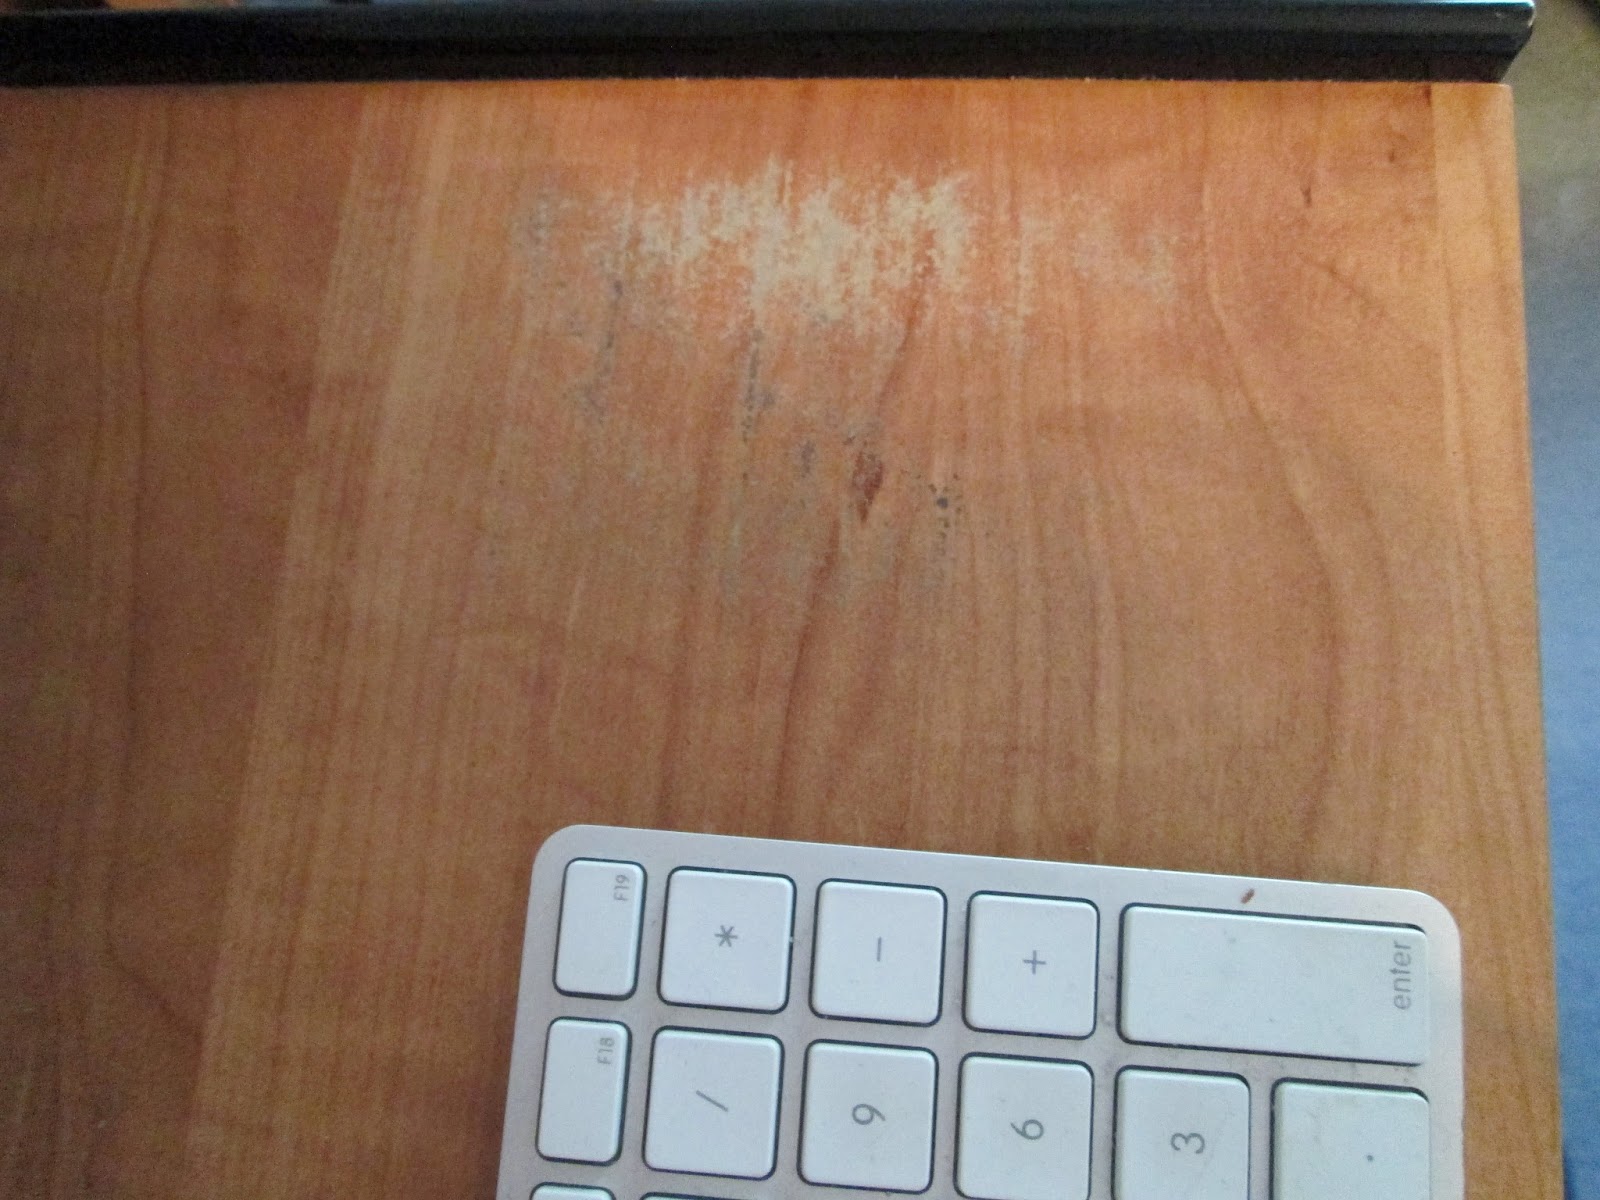
That worn away spot on my pull out tray is where I use my mouse!!!
So...what to do? I could disregard my goals for 2015 and go out and buy another set of furniture, but that would mean spending money to replace something that still has YEARS of life remaining! I could do that. Yes. I could get rid of this furniture. BUT...I STILL LOVE IT !!!!!
So I am giving SERIOUS thought to using ModPodge to decoupage the entire desk top. If it looks good, I could even do the same technique on the top of the file cabinet and 4 section cubby!

Last night I spent HOURS searching the web for "free" scrapbook papers that I could cut into "hexies" to cover my desk top. Then I found a blog that had everything I could possibly want, right at my fingertips. The blog is http://melstampz.blogspot.com/. My only question now is..."Do I cut hexies from all of these papers to have a wide variety of patterns?"...OR..."Do I simply print out tons of the first paper that is hexies already and ModPodge sheets that are close to 8.5" x 11" instead of individual 1" hexagons?"
I'm looking for opinions. What do YOU think?
Toodles...
My thought is to print out a bunch of the paper with the hexies already on it and make a nice arrangement on the top. It would be soooo much easier and will look just as good if you like the patterns on the paper. If it's too white between the hexies, you might see what happens if you color the space between them and then decoupage (a practice piece or use the rows that have partial hexies). To make it easier, I would cut off the partial rows and then you could interlock them easily. Have fun!
ReplyDeleteThank you, Dee. I think you are absolutely right! I think I will print out more of the "hexie" paper, save one as my original, and then cut them to fit together. There is a possibility that further down the line ALL of my sewing stuff may be in one room instead of two...so I took the paper into the other room and it still looked okay with the brighter colors in there. Now I just have to research HOW to do the decoupage and what type of sealant I can use as the final coat. This desk gets a LOT of use and I really need it to be up to the daily punishment, lol. Thank you so much!
DeleteI'd use the printed paper and cut the partial hexies off, leaving the white background, so you can keep the spacing even. It would be so much quicker and easier the doing each hexie separately.
ReplyDeleteThanks, Jen. That is, like you said, going to be the easiest solution...and probably the best prettiest!
DeleteHello, I think you've found your answer. Just wanted to thank you for the link to melstampz. The possibilities ... Good luck with your desk project! It's going to look awesome!
ReplyDeleteThanks, Beatrice! After living with the hexie paper lying on top of the desk for a while I am in LOVE with it. Now I just have to wait until my final decision as to whether I am moving my sewing room before I attempt the mod-podge!
Delete