Monday, October 28, 2013

MOM'S QUILT - IT'S GETTIN' THERE!


Please excuse the "meh" picture...I was standing on a step-stool trying to get a good shot, lol.  Step-stools and I are NOT good friends!  Additionally, the two tables are a smidge too high for me.  DH could lower them, but then they would probably be too low and cause my back to hurt too much.  I can't wait until someday when I have a table that works at MY height, lol.  

All I have left to do is the candy border with the embroidered corners and then I can sandwich it and begin to quilt.  Of course, I do need to press it before I sandwich it...there are wrinkles galore!

I'll post more pics when I get it further along.  Take care, my friends....

Wednesday, October 23, 2013

AN UPSETTING DISCOVERY...

Sorry, no pic with this post.  I got everything into the trash bin before I even remembered my camera.  I went downstairs to the large upright freezer in my pantry to pull out something for dinner, only to discover everything but the bottom two shelves completely defrosted!  Lots of food and money is now in my big trash bin waiting for pickup Friday morning.  Both crockpots are going cooking up food I was able to save and 10 fully frozen thighs are in my fridge defrosting for later in the week.  I am now sitting on the sofa with a cup of coffee and snack pack of cookies...I need comfort!

A FINISH, A DISAPPOINTMENT AND A TRIP DOWN MEMORY LANE!


Remember my newly painted guest bathroom?  Well, I added a bit more to it yesterday!  It isn't done yet...I have lots of ideas still to come to fruition!  

Yesterday while I was out I picked up the cute little silver and black reed infuser, or is that diffuser?  I needed "something" for on top of the little cabinet, but didn't want it to be anything too big or heavy...the cabinet is held on with two keyholes and screws...and only one of them is in a stud, the other was hung using a "thing-a-ma-bob" (come on, girls, you know what I mean, lol) for drywall with no stud nearby.  Darn word completely escapes me.  I HATE when this happens!  Anyway...the towels are not the new "guest" towels I plan to buy, they are quite old (which explains the discoloration on the washcloth) and were only hung there to test out the towel color.  Yup, black does the trick.  And now, on to my finish...


If you swing around you can see the curtain I made to match the shower curtain.  It was easy-peasy to cut down a second shower curtain to make the valance.  I think I am going to use my mom's trick of clipping on some clothespins to help the pleats drape a bit more regularly.  One steamy shower and they should dry perfectly.  I think I will shower here over the weekend to provide the needed steam.  If you look to the top of the curtain you can see the traditional curtain rod that was hanging there already.  A quick squirt or two of silver paint and it was redone.  And my dad gave me the paint to use...so it was a FREE redo!  It isn't a complete match, but at least it isn't the "glaring" white of the unpainted rod, lol.  My next job is to replace the yellowed shade with mini blinds.  I buy my mini blinds at Walmart.  Dirt cheap and they actually wear like iron.  I'm sure my dad will help me hang them.  


Just next to the window (toilet beneath) is the vanity.  I bought the two brushed and shiny chrome pieces at Ross yesterday (with the reed infuser).  The jar holds Q-tips and cotton balls and the brush holder now houses two new brushes and a travel sized tube of toothpaste...just in case we have unexpected overnight guests.  Please excuse the filthy mirror...it hasn't been washed since the painters were here.  Time to get out my vinegar and water!  I still want to buy a can of black Krylon paint (for plastics) and paint the Dixie cup holder.  I also want to buy a plastic cube tissue holder for on top of the toilet tank.  I would love to find one in black, but I will take white and paint it with the Krylon.  

My next project will be the vanity itself.  Both the base and the sinks have yellowed over the years.  I would really like to repaint the base with a new coat of white paint (dang, should have thought to have the painters do it) and I would like to dress up the plain white doors with some beadboard and trim to match the front of the white cabinet. I would like to replace the sinks with plain white instead of the white and beige swirl that has yellowed to totally beige.  I'll keep you posted as I get things done. 

So, that was my finish.  Now, my disappointment...


These huge boxes sitting on my porch are for the UPS man to pick up today.  They are the project table for my yellow room that we bought from the Improvements catalog (Can you understand why I had to call J just to get them in the house, lol?)  I. SHOULD. HAVE. KNOWN. BETTER!  Poor J came over last night to assemble it.  Horrible.  Absolutely, totally inferior product.  The boards were warped, the holes didn't line up, the holes drilled for the silver turn-y things (technical term here, lol) were not deep enough.  After 45 minutes of fighting with it, J called "UNCLE" and I phoned Improvements to tell them I wanted my money back.  They appear to be okay with the return and said it will be free shipping...but we will see when my charge card gets credited.  J laughingly said if we EVER buy another "assemble it yourself" item that ISN'T Ikea...we can build it ourselves!  He was laughing, but I think there was a ring of truth in there.  Ikea furniture is foolproof.  We have ALOT of Ikea in our basement and bought tons to furnish J's apartment when he was away at college; and we have NEVER had a problem with assembly.  As he was leaving last night J told me not to worry...he will go to Ikea and buy what I need and then deliver it and build it.  My heart is melting... We raised a good boy...


Speaking of my boy...while going through some closets I came across the second quilt I ever made.  Back in 1991 I took a quilt class and made my first quilt, a gray/burgundy/mauve/blue, "Trip Around The World".  It hung in our basement until 2010, blocking the draft at the Bilco door.  When we had the basement finished the quilt came upstairs to snuggle under.  Anyway, the whole time I was making that quilt my then 3-year-old  begged me to "make ME a quilt, mom!" What was a mom to do?  Make my second quilt one just for him, of course!  Here is J's quilt... appropriately named"Make Me A Quilt".  It covered J, his bed, and floor, and any other stationary object, for quite a few years. 


Unfortunately, after tons of lovin' and TONS of washing (at LEAST once a week) the quilt has seen better days.  The seams are ripped, the material itself is ripped and the batting is almost non-existent in places.  But I can't bear to part with it.  I can still see his little blonde head straining to see over the top of the six foot tables to catch a glimpse of his quilt.  Believe it or not, I still have all of the fabrics used in this quilt and SOME DAY I will either fix it myself or find someone nearby who is a much better quilter than I and can fix it properly.  I would love to pass it on to a grandchild someday...

That is all that is new at my house today.  What's new at yours?

Friday, October 18, 2013

SNEAK PEAK


Above is a "sneak peak" of the embroidery that is going to fill the upper and lower sashes of my mom's quilt.  As you can see, I haven't torn off the stabilizer, nor have I cut the jump threads...but this IS a sneak peak, lol.  I have five more sequences to do on the lower sash and then I can clean them all up and sew on the sashes.  I'll try to give you another "peak" when that is done, before I put on the border and corner embroidery!

Until next time!

I've linked up at:  

http://www.bloglovin.com/frame?post=1774542373&group=0&frame_type=a&blog=5115237&link=aHR0cDovL21hcmVsaXplLXJpZXMuYmxvZ3Nwb3QuY29tLzIwMTMvMTAvYW55dGhpbmctZ29lcy1tb25kYXlzLTM5Lmh0bWw&frame=1&click=0&user=0

Monday, October 14, 2013

QUILT UPDATE....


It's been a GOOD, productive morning!  Hooray!!!!

This is where I stand on mom's quilt right now.  I got all of the sashing done this morning as my pain level was pretty low and my hands weren't shaking too badly.  I just had to wash the second blood stain out of the quilt, though, so my body is telling me it is time to stop, lol.  I have had major balance issues since I woke up this morning.  I almost fell when I went to take my first steps...fortunately there was a wall there to catch me.  So I am going to spend all day today on my tush.  At least that way I am safe!  

I just realized when I hung the quilt that I forgot to do the pretty stitching connecting the quarter dresdens in the center block.  I wrote myself a note and put it on my sewing table.  My memory is so bad these days that I don't want to forget to do it!  Next I will be adding a 6" (I think) white sash to the top and bottom.  I am going to machine embroider a cupcake border into the sash...so I have to do a sample to see the finished size of the embroidery, then I can make the height of the sash appropriate to the design.  Then comes a 3-4 inch wide "candy" border, the four corners of which will be embroidered sweets.  Then the binding.  I haven't decided the material yet for the "candy" border...I will make the decision when I have the sash embroidery done and attached.  While I had a pretty good idea of my overall design going into this...my quilt designs tend to "tighten up" as I go along. 

Now that I am done with my crafting for today (unless the tremor improves) I think I will head downstairs to either watch TV or read...both keep me safely on the sofa!  

I'll keep you posted as I get more done!

Thursday, October 10, 2013

THREAD....

We all need it, but BOY what a mess it can make in your sewing room! 


Last Christmas my mom and dad got me a Helmer drawer unit from Ikea.  It fits perfectly under the drop leaf table top (also from Ikea) where I do all of my cutting, ironing, etc.  


As you can see, my gate leg table and Helmer drawers form an "L" wth my sewing table...making the placement perfect for easy access to my thread.  


As you can see in the above picture (sorry for the duplicate photo), my drawers are labeled according to the type of thread they contain...Cotton (CT - Connecting Threads), Cotton (SLKY - Sulky Brand), and Poly (EMB - Machine Embroidery Thread).  Slightly organized, but not as organized as I would like them to be. 


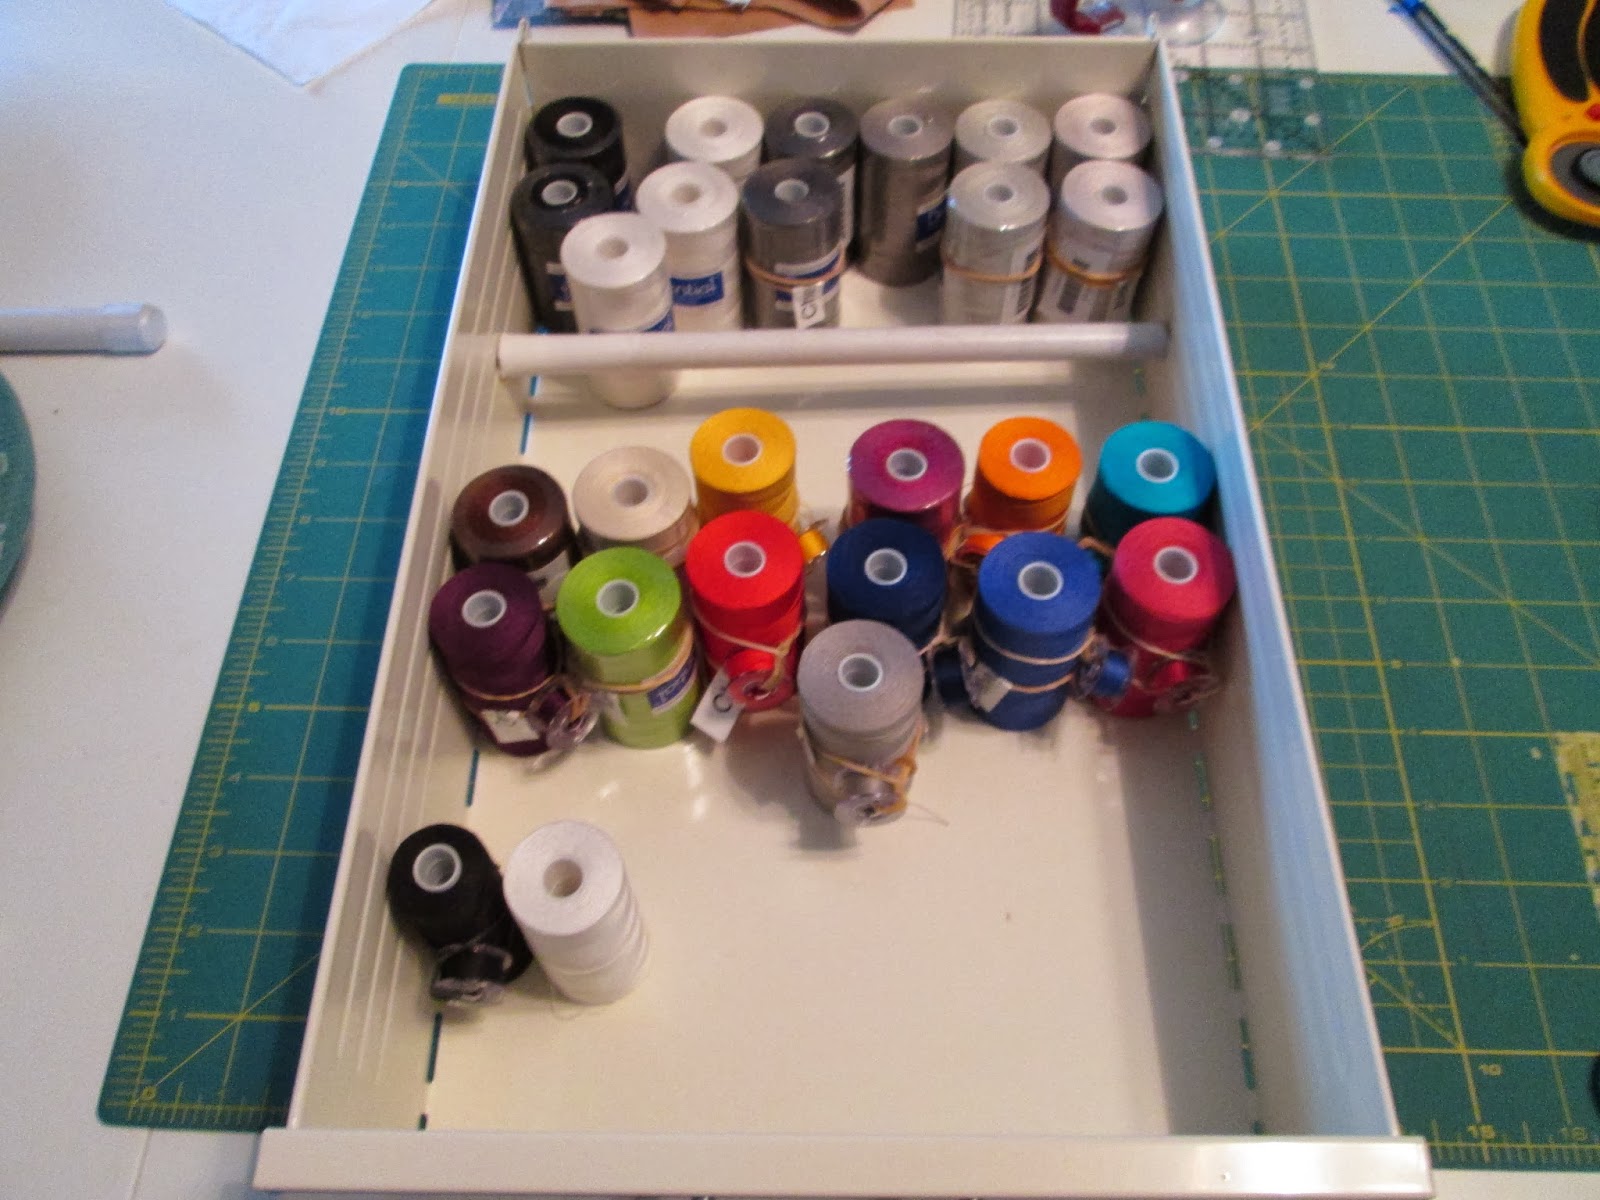
Additionally, we all need bobbins of thread to match!  I purchased a small bobbin holder and put the label from a set of threads from Connecting Threads inside.  I tried, as I used a thread from the set, to put the corresponding bobbins in the case.  They were there, but the thread was unwinding and tangling.  So I tried putting a small hair elastic around the bobbin.  It worked, but then I couldn't see the thread color!  


Not too long ago I saw a picture on Pinterest which showed how to fasten your bobbin directly onto your spool of thread in order to keep them together.  It didn't cost anything, well except for the cost of a rubber band, and I loved that the two were attached together so securely.  No bobbins falling off of the top of the spool when I went to take it out of my drawer.  


Connecting Threads sells one of my favorite "all purpose" threads.  While they have a bazillian different colors of thread, once you take off the cellophane wrapper you have no clue as to the name!  I used my Brother P-touch label maker to print out a label for each color thread.  If you fold the label slightly the backing comes right off, no trying to peel it from a corner and losing my sanity in the process!  


I then folded the label around the middle of one side of the rubber band. 


Then stick one of the ends of the rubber band through the bobbin and the other end of the rubber band through it.  


Holding the bobbin against the spool of thread (trapping the end of the thread), wrap the rubber band around the spool and over the bobbin. 


Your bobbin is now attached securely to the corresponding spool of thread and you can tell the color of the thread at just a glance.  


I used the cardboard tube from a pants hanger, cut to size to fit "firmly" to provide a divide between the colored threads I use for ordinary sewing and piecing and the colored threads I use for quilting.  When my order comes in from Connecting Threads I will add the new spools to my current collection with their color labels attached to a rubber band so they will be ready to go when I am ready to sew!

Next I will tackle my Sulky drawer and the drawer that holds my machine embroidery thread.  That one will be done the same way, except the threads have "numbers" instead of color names and I have a LOT of threads to organize! 

Monday, October 7, 2013

IT'S A PAMPER ME KINDA DAY...

I woke up this morning to cloudy skies and predicted downpours.   My body has certainly confirmed the forecast!  I managed to sew one quarter of a Dresden plate before I had to call it quits.  I have moved to the family room, snuggled into my leather sofa recliner and wrapped myself up in a warm quilt.   Now snug as a bug, a mug of steaming flavored coffee in my hand and my IPAD in my lap, I can pamper my aching body for the rest of the day.

I just checked my email and discovered I won a giveaway!  WooHoo!  I really appreciate the win, especially finding out about it on a "pamper me" day.

Hope you are all staying snugly warm!  Take care!